

Google Forms is great! You can use it to create a survey or a quiz, or collect registrations. But there is more to it than you might think. Here are 10 tricks to help you get more out of forms!
1. Limit response length
When using short answer or paragraph text question types, turn on data validation to limit response to within a certain character limit. Note that this is a character, not a word limit. Turning this feature on does not provide users with a character count, but they will see an error message if they exceed the limit.
This feature can be used to limit responses on forms such as a call for speakers or to ensure that complete sentences are used on a student quiz.
How: Read this post!
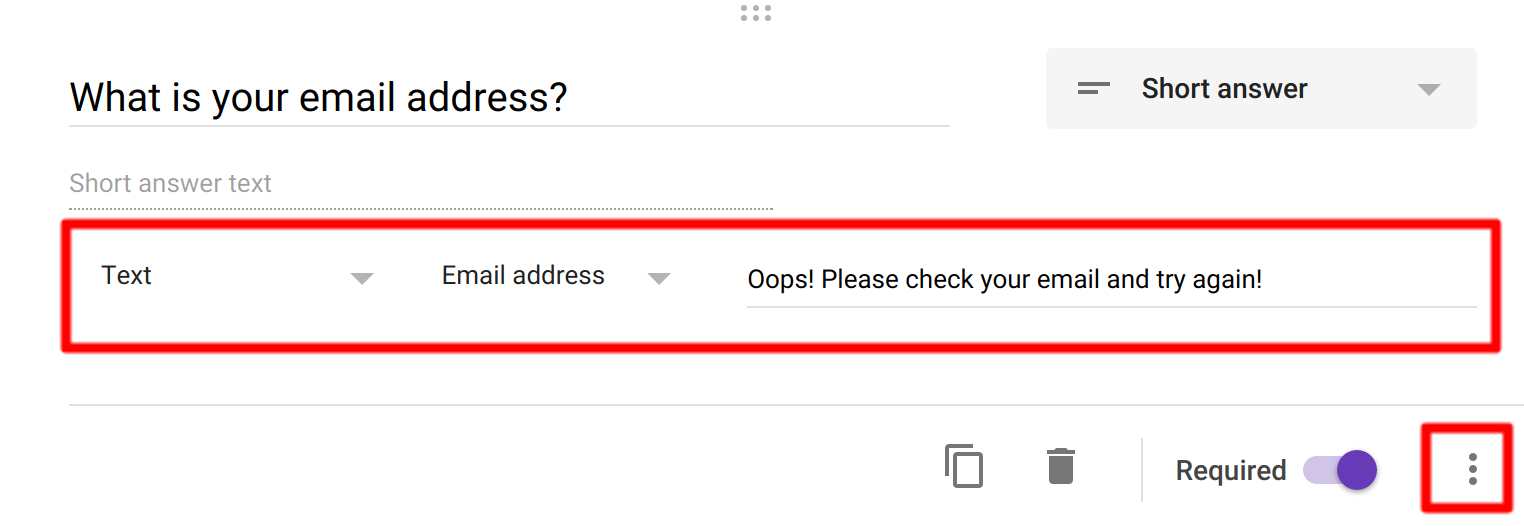
2. Validate Email Addresses
For some reason, people have a hard time typing in their own email address. It is not uncommon to get email addresses with accidental spaces, commas, or incomplete information (i.e. no .com). You can eliminate this issue by using the data validation tool for email address on a short-answer question. This ensures that the information provided will fit username@domainname.com/net/org.
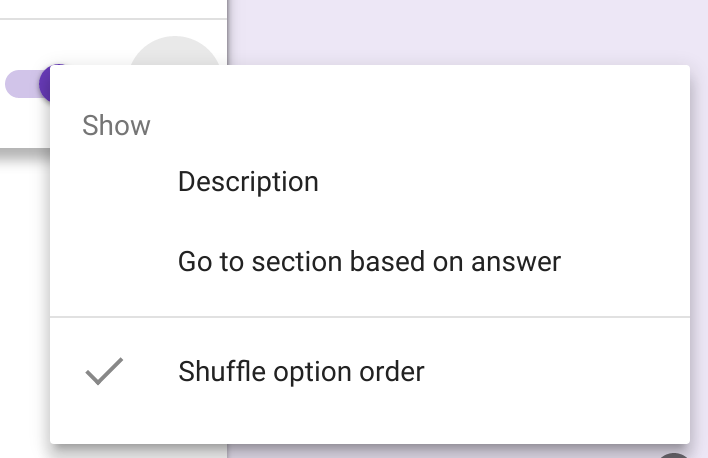
3. Shuffle option order
Preventing cheating is a concern of teachers who use tools such as Google forms to deliver assessments. While it is impossible to eliminate all possible methods of academic dishonesty, you can certainly make it harder to cheat! Turn on “shuffle option order” for a multiple choice or checkbox question to randomize your assessments. This feature can be used inplace of the “shuffle question order” option or in conjunction with it. Using this feature will NOT impact the use of Flubaroo or the quiz feature of Google Forms.
4. Block your sections
If your form has several distinct sections such as personal information, and survey questions, or sections from different topics covered in class, you can block them in two ways:
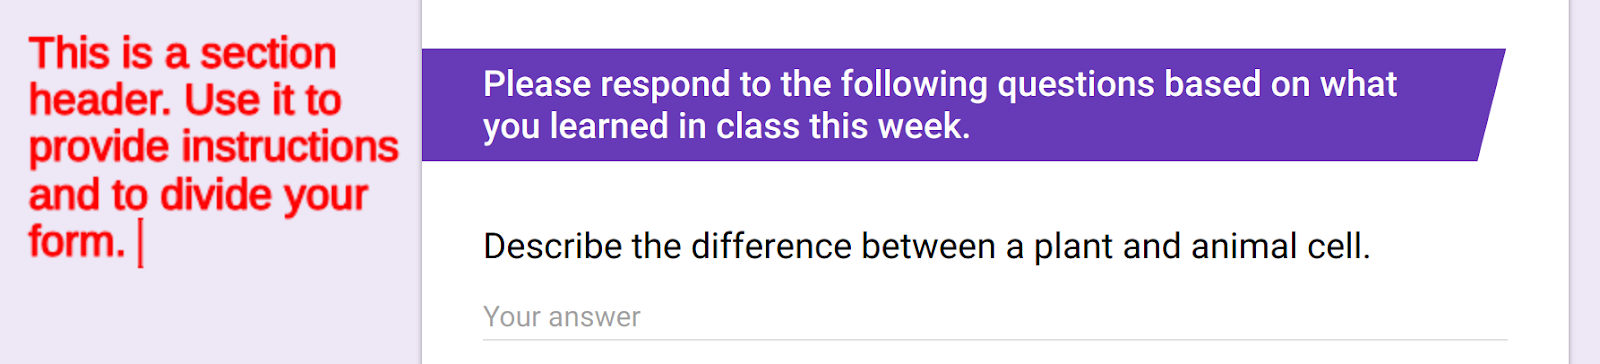
Insert Title / Description
Use this feature of forms to add a colored break in the form to identify a new section. You can also add a description with special instructions. Using this element does not break your form into multiple parts.
Insert Section
A section is similar to the Title / Description except that it actually inserts a page break into your form. This is helpful if you want to clearly divide your form into multiple parts. For quizzes, this can be a helpful way to prevent students from looking ahead/behind in the quiz. You can also show users a % meter to indicate how much of your form is complete.
5. Create branching forms
Remember the old “Chose your own adventure” books? You would get to the end of the page and either go to page 7 or 15 based on a decision you made for the characters in the story? Google Forms can do the same thing.
Configure a multiple choice question to take the user to a new set of questions based on their response. This is very helpful if you want to skip a section that is not relevant to the person completing the form. It can also be used as a simple adaptive assessment tool. If a student answers a multiple choice question incorrectly, they can be directed to an easier question or to material that will help them review the skill they need to develop.
In order to use the branching feature of forms you must have to elements:
- A multiple choice question
- A least two sections (see above) in your form.
6. Use Multimedia
Text-only forms are boring. Make them more engaging by including video and images! This is especially helpful when using forms for assessment purposes. Here are three ideas to consider:
- The labeled image - insert an image with a series of labeled elements (i.e. parts of the cell, characters in a story, etc). Below the image, insert several questions that require students to reference the image above.
- The Video challenge - Insert a YouTube video into your form that provides students with a quick (1 min or less) set of information. Ask questions about the image. This works great for music and world language courses!
- The Animated Gif - use an advanced image search to find animated .gif files. Save and insert the image into Google forms and watch it move! This trick is great for science courses and for schools who are blocking YouTube.
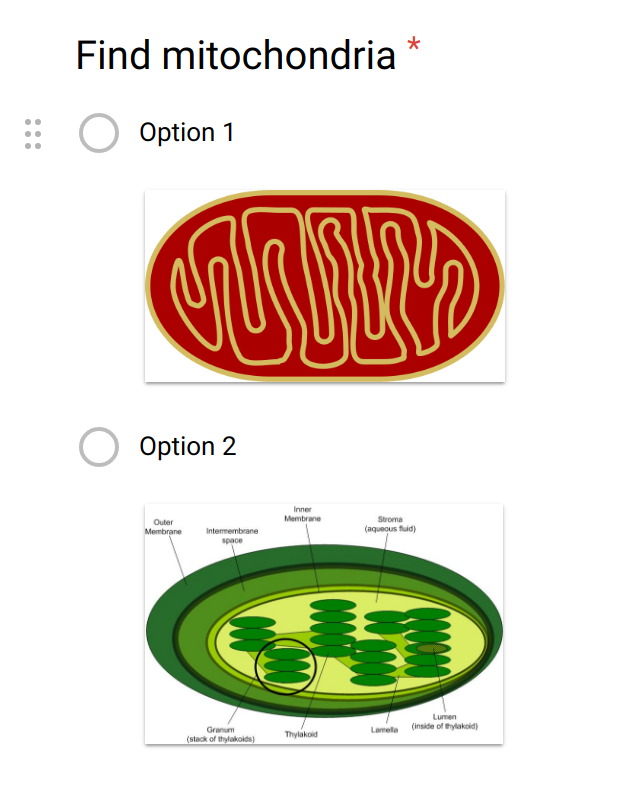
NEW: As of August, 2016 you can now use images for multiple choice questions! This is a great new feature that will be particularly helpful to elementary and math teachers. If you are using Flubaroo or the Quiz feature in forms to grade assessments, it is important to make sure that you do include a text label in your form otherwise you will not be able to determine which selection a student made when you look at the linked spreadsheet.
7. Reuse your form - not your spreadsheets
It takes a lot of work to develop a survey or quiz using Google Forms. Once you have invested the time to create a form you can re-use it over and over again! DON'T make a copy of your form, instead, follow these steps.
Note: these directions are for the NEW forms. If you have old forms, you may need to update them before following the steps below.
- Open your form
- Click on the response tab
- Click the “snowman” (three dots in the right corner) and select “unlink form.” This will unlink the form from the previous sheet that was collecting responses. It will NOT delete the data you have already collected.
- Click the “snowman” again and select “delete responses.” Although you have disconnected the spreadsheet, your form still retains the previous response data. This action will reset your form to zero. The original form data IS still contained in the spreadsheet that was unlinked in step 3.
- Click the snowman and click “select response destination”. Name the spreadsheet with a specific name. This is where NEW responses will be sent.
This trick above is helpful for teachers who have multiple sections of the same course but don’t want to copy their form for each section. Each section gets its own SHEET, not its own FORM.
8. Copy / paste a list
Sometimes it is best to ask respondents to make a selection from a list rather than type in a response. Typing that list into Forms can be tedious. Instead, copy and paste it! Google Forms will place the copied elements into the form as a new selection. This is great for creating a class list or a selection of times for parent teacher conferences.
Note: there does seem to be a limit to how many lines can be copied at one time. If you are having trouble pasting your list, try a smaller number of items (10-15 seems to work).
9. Form Restrictions & Roadblocks
There are times when you may wish to prevent a form from being completed until certain other actions have been taken. For example, a teacher may not want students to take a quiz until she has verified that they have completed their homework. Google forms only offers an on/off feature and does not offer password protection.
You can setup a makeshift password protection on your form by using the data validation option in a short-answer response. Here’s how:
- Create a new section in your form. This is where your “password” field will live.
- Create a short answer question in section 1.
- Turn on data validation and set it to: Number > Equal to > [insert a secret number]
- Add help text: Please check in your homework to receive the password to complete this quiz.
- Add your quiz questions starting in section 2.
Note: this is NOT a 100% secure system and should not be used to protect critical information. It is possible to reverse engineer the secret code. Some of your students may know how. I will not explain how here in case they are reading this right now...! = )
10. Add-Ons
Need to do something else not listed here? Add-ons may hold the solution to your problem! Add-ons are utilities that can expand what Google Forms does on it’s on. Add-ons must be “installed” before you can use them. To access the add-ons, click the “snowman” icon in the top right corner of a form and look for the “add-on” puzzle piece icon.
While there are many add-ons available, these are the ones that I have found quite helpful.
- Choice Eliminator 2 - removes options from your form once they have been selected. Perfect for time slot registrations or other limited quantity applications.
- FormRecycler - pull in questions from other forms.
- FormLimiter - restrict your form to only accept a specific number of responses or turn it off at a certain time.
- Form Publisher - publishes form responses as documents or PDFs. Very helpful when collecting long-form responses which are difficult to read in a spreadsheet.
- All Questions Required - yup, that’s what it does!
Did I miss anything? Let me know what form feature is your favorite!
Interested in seeing these ideas in action? Check out my post on 25 Ways to use Google Forms in the Classroom!
--------------------------------------
 Each spring I offer a 5 week Google Forms masterclass. Join me for a deep dive into Google Forms!
The feedback has been outstanding:
Interested? Visit Chrm.tech/forms for all the details!
Interested in seeing these ideas in action? Check out my post on 25 Ways to use Google Forms in the Classroom!
--------------------------------------
Are you ready to become a Form Fanatic?
The feedback has been outstanding:
"I was a casual user of Forms, but I was not using the data that I had collected to it's full potential. Now I am writing better Forms so my data is of higher quality and I am better able to analyze the results so I'm making decisions based on data...not just giving surveys." - Laura Foreback, middle school teacherThis course is perfect for classroom teachers, tech coaches, and school administrators!
Interested? Visit Chrm.tech/forms for all the details!
Is there any way to prevent students from highlighting a word on their iPad and selecting "look up" or "define"?
ReplyDeleteThere is not.
DeleteI would recommend reading this article I wrote on this and issues related to auto spell check and language translation: https://goo.gl/PLVHnU
You might also find this article on writing "Google Proof" questions helpful: https://goo.gl/Z4Owx
Is there any way to lock the language? I teach Spanish and with a click they can change to English, take the quiz, and change it all back to Span9sh and submit
ReplyDeleteHi Gayleen! The language settings are controlled by the operating system (Mac, Windows, ChromeOS) AND the web browser. There are a few things you can do to make it more difficult to auto-translate a page, but not 100% fix the issue.
DeleteYour IT admin can disable the Google Chrome translation prompt that show up when you view a page that isn't in your primary language.
Instructions are here: https://goo.gl/q4M8w2
Hi, can I see how long it takes for a candidate to complete a quiz?
ReplyDeletenot easily. The form will automatically collect the date and time the form was submitted. You could ask them to record the date and time that they start taking the form and then calculate the difference.
DeleteYou could use 2 forms, the first just collecting basic info (name, class period), and both automatically collecting email. Have the confirmation message after submitting the 1st form provide the link to the 2nd form. You'd have to combine the data from the 2 forms, though, or use vlookup to compare timestamps.
Delete