The Electric Educator: lesson idea
Showing posts with label lesson idea. Show all posts

Thursday, April 12, 2018

Sharing Classroom Data with Sheets


There are some really interesting ways that classroom teachers can use Google Forms, Sheets, Slides, and Sites to share information. 

The best way to explain what I mean is to show you an example.

I created a classroom reading log to track the number of books that my class read.

Students fill out a Google Form each time they finish a book and that information is automatically published on our class website

Because forms, sheets, and sites are all connected, the class chart is immediately updated each time the form is submitted. Like magic! 

There are a few things going on behind the scenes that makes this system possible. 

Step 1: Collect data with a form

Using a form ensures the consistency of the data and makes it very easy for students to fill out. 

You can easily share your form in Google Classroom for easy access. 

Here's an example of my reading log form


Step 2: Collect & Calculate in Google Sheets

Each time the form is submitted, the data is logged automatically into a Google Sheet. 

That's great, but we need to perform a few simple calculations in order to track our class goal of reading 100 books and 10,000 pages. 

If you view the spreadsheet you will notice that for every form entry I add "1" to the "Book #" column. This allows me to add up all of the submissions to determine the total number of books that we have read. 

In order to make sure that my calculation is added for each new form submission I am using the Google sheet add-on "copy down" to copy my formula to all new submissions. 

If you look at the "class data" sheet you will see where I have entered target goal of 100 books and 10,000 pages as well as the current progress (added from the form responses) and our % of completion. 

All of these calculations were created using simple spreadsheet functions. 


🎥 Need some help?  Watch this video on adding simple calculations into Forms

Step 3: Create your Charts


Now that I have collected the data and calculated my total, I can create graph. 

The graph was created from the "class data" sheet that summarizes all of the submissions. I only have two data points (books read and pages read), so this is a pretty easy chart to create. 

The chart editor in Google Sheets will walk you through the process. Just highlight your data, click on insert > Chart and edit as needed. 


For my book log I chose the "gauge" chart type. You could also chose a line graph, pie chart, etc.  

🎥 Need some help? Watch this video on creating custom charts with Sheets!


Step 4: Embed / Share your Chart


Once you have created your chart you can share it in a variety of ways: 
Because each of these charts is connected back to the spreadsheet, as new form submissions come in, the chart will automatically update! 

🎥 Need some help? Watch this video on publishing charts. 

Other Ideas:


Class reading logs aren't the only way that you could use this idea in your classroom or at your school. Here are a few other ways that displaying live data might be helpful: 
  • Track student absences
  • Track plant growth (or any lab data)
  • Track overall student performance
  • Track physical fitness (health class)
  • Track fundraising goals
  • Track team stats (turnovers, rebounds, assists, etc)

Make a copy!

Interested in setting this up for your school? I did all of the hard work for you! Click here to make a copy of everything you need!

Note: due to limitations with the new Google Sites, you won't be able to make a copy of my site. Setting up your own will only take a few minutes.

Want to become a Forms Master? 


I offer a 5-week online course called "Google Forms for Educators." This is one of the activities that I help you create during the course. If you are interested in more tips on using Forms and Sheets in the classroom head over to the course page and add your name to the wait list!

Friday, March 16, 2018

30 Ways to use Google Forms in the Classroom (updated examples!)


Google Forms is one of my favorite classroom tools.

But here's the deal - most teachers aren't taking full advantage of what Google Forms has to offer!

You have probably used Forms to create a survey or give a quiz, but that's not all Forms can do!

Here are 30 different ways you can use Google Forms in your Classroom - with an example for each!


I also created a PDF version of this post with links, images, and an option to make a copy of each form. Click here and I'll send it to you via email!

1. Reading Quiz - Hold students responsible for reading assignments by giving a simple quiz. This example is based on Fahrenheit 451 in a high school English classroom and is configured to release the quiz score immediately after submitting the quiz.

2. Chromebook Quiz (with images) - This quiz uses images to test basic Chromebook literacy. It is set up so that the student immediately receives their score and can see which questions they got wrong.

3. Bell ringer / Do now activity - This morning math check in activity is completed by students first thing in the morning before the start of class. The form uses data validation to provide hints if the student is struggling to get the correct answer.

4. Mood Check-in - Students will have a difficult time learning if the arrive at school filled with worry and concern. This mood check in provides a safe space for students to share their current mood and concerns with you. By using a tool like Form Postman you can configure the form to send you an email if a student indicates a negative emotion.

5. Permission slips - Field trips are fun. Permissions slips are not. This form allows parents to digitally sign permission slips. In an effort to prevent students from completing their own permission slip a parent email address is required and a notification is sent to this email address using Form Postman.

Choice eliminator is used to remove student names from the drop-down list once a parent has given their permission. This makes it easy for a teacher to identify which students do not have a permission slip on file.

6. Book report generator - Writing reflectively is a key component of the common core standards. A book report is a tremendous way to help students practice reflective, informational writing, and to also encourage them to identify elements of literature such as genre, plot, and setting. As a bonus, they can share their writing with others!

This form provides a simple way for students to share their thoughts on a book that they have read. I am using a tool called AutoCrat to take the form submissions and turn it into a nicely formatted Google Doc which can be easily printed or shared electronically.

7. Lab Data Collection - Simplify data collection and analysis for your next lab activity! In this example, student submit their lab data through a Google Form which automatically updates the totals on the lab document.

Tim Welch set up a similar activity with a detailed video and written explanation.

8. Yearbook Photo Page - Google Forms has a file upload feature that you can use to collect digital files. In this example, teachers submit their favorite Bitmoji image for use in the school yearbook.

You can go even further by using AutoCrat to take the images and add them to Google Slide presentation ready for printing!

Jennifer Scott is using Google Slides to design her school yearbook. Check out how she uses this system in this video.

9. Certificate Creator - Creating certificates is a pretty common tasks in education. Whether honoring students for their academic or athletic achievement or documenting professional development activity. Forms is a convenient way to generate certificates.

This simple example collects your name and email address to generate a simple certificate in Google Docs which is emailed to you as a PDF.

10. Form to Lesson Plan - Use a Google Form to fill in your plans each week. This form is filled with checkbox and drop down fields to simplify submitting information.

Thanks to Amanda Dykes for sharing this example! Check out this guide to setting up and using this form!

11. Course Evaluation (with branching) - Good teachers seek feedback and constantly work to improve their course. This is the course evaluation form that I use to solicit feedback on my online courses. This form takes advantage of question branching; based on your answer to a question the form splits to ask additional follow up questions (i.e. indicating that you would like a sticker takes you to the address section).

12. Call for Speakers Form - If you help organize a conference or professional development day you can use Google Forms to collect session descriptions. This example is carefully designed to collect all of the information that is used to create the conference program with minimal editing.

13. Elementary reading Inventory - Use this form when evaluating the reading fluency of a student. Reading inventories are typically completed 2-3 times each year. This form makes it easy to collect store, and analyze collected data to observe student growth.

14. Idea / Opportunity Tracker - Record ideas when inspiration strikes! Add in your own categories and fields to make sorting and organizing your ideas easier. Use the reminder add-on for sheets to receive an email reminder of upcoming opportunities. I have this form saved as a bookmark for easy access.

15. Google Forms as a Rubric - Rubrics are the ideal method of evaluating project based learning. This Google Form makes it easy to complete an evaluation while you are reading a student paper or viewing their physical project. Use a tool like AutoCrat or FormMule to automatically send students a summary of your evaluation and comments.

Google Forms for Educators


16. Track Standards Based Grading - This simple Google Form simplifies the process of tracking standards-based grades using Google Sheets. This form is filled out by the teacher each time you introduce a new assignment to your students. Once submitted, you can view and modify student grades through Sheets.

Watch this video for more insights on how to setup and use this system in your classroom!
Thanks to Stephanie Howell for sharing this example!

17. Parent Teacher Conference Sign Up - Coordinating conferences with parents is a difficult administrative task. This Google Form collects the necessary information and displays the available time slots. By using the Choice Eliminator add-on time slots are automatically removed from the form once selected, minimizing the chance of double booking. The FormMule add-on automatically sends an email with conference information.

18. Discipline referrals - Quick action is important when dealing with student discipline issues. Google Forms provides an easy way for teachers to submit incident reports which can immediately be routed to the appropriate administrator for follow up. Because Form data is pushed to Google Sheets, administrators can add additional comments and use a tool like AutoCrat to generate a discipline referral documents.

19. Volunteer Registration - Coordinating volunteers is a lot of work! Google Forms can help organize and coordinate volunteer positions. By using a tool called “choice eliminator” you can automatically remove volunteer opportunities after they have been filled.

20. Parent Contact form - The parent contact information that schools have on file is frequently incomplete or out of date. During back to school night I provide parents and opportunity to share their contact information with me so that I can keep them up to date on the progress of their student. This is also a great time to ask if the parent is interested in receiving Google Classroom updates.

21. Engagement tracker - Are your students engaged in classroom learning on a daily basis? Anecdotal observations frequently fall short when you are tracking engagement of 25 or more students. This simple form makes it easy to quickly scan your classroom and identify students who are engaged in the learning process. Over time, the summary of responses will reveal which students are regularly engaged, allowing you to identify opportunities to improve instruction and intervene with students who are frequently disengaged.

22. Behavior logs - This form was created for a school that adopted the Antecedent - Behavior - Consequence (ABC) discipline model. The form allows a teacher to make quick observations using their mobile phone which they can review, modify, and update during their planning period.

23. Parent contact log - This is a simple form to record conversations with parents and guardians. Veteran teachers understand the importance of documenting classroom communication to resolve conflicts and comply with IEP requirements.

24. Student progress tracker - When working on a long-term assignment such as a research paper, tracking student progress and understanding what each student is working can be challenging. Ask your students to complete this form each time they finish a component of their project. This will give you a snapshot of what students are working on.

This form has been configured to automatically collect user email address and limit to one response. After submitting the form the first time, the student will be prompted to “edit your response” rather than submitting the form a second time. This allow them to update their progress so that the form response data is accurate.

25. LIVE Reading log - Keep track of how many books and pages your class (or school) has read by taking advantage of the LIVE chart and graph feature of Google Sheets.
  • Have students log their reading using a Google form (like this)
  • The data that is collected feeds into a Google Sheet (like this)
  • Create a chart that tracks pages and books read. (like this)
Embed the chart into a Document, Presentation, or Google Site and watch it grow!

26. Classroom Observations - School administrators can create a standardized and transparent observation system with Google Forms. This Form includes all of the agreed upon observation criteria which can be completed on a mobile phone or tablet during the walk through. This system removes the guesswork from observations. By using a tool like FormMule the administrator can provide a copy of the observation to the teacher immediately upon submitting the form.

27. Kindergarten Registration - Google Forms is a helpful tool for collecting information on incoming Kindergartners. This form is filled out by teachers after interviewing new students. After submitting the form, a summary document is generated by AutoCrat which is accessible to the entire grade level team and school administrators.

28. Digital Escape Room - Google Forms can be used to create a digital puzzle, similar to an escape room or BreakoutEDU box. This example example was created for a teacher conference. Forms like this are accompanied documents, links, videos, etc which contain the answers to the riddles. Escape forms like this take advantage of page breaks and data validation to block progress until the correct answer is submitted.

29. Elementary Math Quiz - This simple math quiz helps first grade students practice basic math skills and the use of technology in the classroom.  This example places each question in its own section so that students can only see one question at a time. Images are used extensively to reduce the reading complexity.

30. Digital CLUE - Technology Coach Stephanie Howell from Pickerington, Ohio created a version of  CLUE using Google Forms! Students answer content questions to reveal clues that can be used to identify a suspect, location, and method to solve a classroom mystery.

Watch this detailed video to make your own version of CLUE using Google Forms!

I hope I have been able to inspire you with what you can accomplish with forms! I would love to help you dig into creating Forms for your classroom.


Want to design better forms?

Each spring I teach a 5 week course via Google Classroom for teachers like you! You can get the details and find out the next time I'm offering the course by visiting chrm.tech/forms.


Thursday, April 27, 2017

Learning in Unexpected Ways

Sometimes learning occurs at unexpected times in unexpected ways. 

That's what happened to us this week around the dinner table.

I have a lovely wife and 5 kids. It's a bit crazy, but that's how we like it.

While we were eating dinner we were watching the birds at the bird feeder. I downloaded a cool bird identification app on my phone and we were figuring out the names of our flying visitors. The app also included songs and calls from each bird species which the kids thought was pretty cool.

Over Christmas we got an Amazon Echo which has turned into one of our favorite tech tools. I have been surprised how much we use and appreciate it (it's a great way for kids who can't yet type to look up information). The Echo has a great speaker with crystal clear quality, even at high volume.

All of a sudden I had an idea. Why not move the Echo to the porch, connect my phone via Blue Tooth and blast out bird calls to the entire neighborhood.


My kids were super excited and fascinated as we called robins, red-wing blackbirds, and cowbirds to our porch....and it worked! The birds were super confused as they perched on the feeder and looked around for the mysterious intruder invading their territory.


Learning and exploration can't always be scripted. 


This wasn't a lesson. There were no objectives. We were curious and decided to see what we could learn. Sometimes going off script yields the most memorable learning moments.

Thursday, March 9, 2017

4 Reading Month Activities

4 Reading Month Activities | John R. Sowash

March is reading month! Reading and writing are foundational skills; There is nothing more important. However, in this age of constant access to multimedia, motivating students to read can be difficult. Here are 4 ideas for encouraging your students to read. 

Note: If you were a subscriber to my email list, you would have received these four ideas in your inbox! Each month I send out an email with recent EdTech updates and an original article focused on using technology in the classroom. Subscribe below!

3 Act Story Challenge


After your students have finished a book, give them an index card. On one side, have them write the title and author of the book along with 3 key moments (a very simple outline). No more than 3!

Note: you can skip the writing part for younger students.

On the back, ask the student to draw a simple 3-act story. You can also use this template.

When finished, hang the picture card in the classroom so only the pictures are visible. Provide small, colorful sticky notes nearby and allow other students in the class to guess the title by writing it on a sticky note and putting it on/near the drawing.

3 Act Story

Note: the 3 Act story challenge is a well established genre. This idea could be expanded into a full lesson to teach elements of plot and story structure.

eBooks with a Soundtrack


Looking for an immersive reading experience? Check out the free eBooks from BookTrack Classroom! This free classroom service enhances written text with sound effects and background music to set the mood. Check out The Raven by Edgar Allen Poe (tip: don't read it in the dark).

Booktrack Classroom
Not only can you read books using BookTrack Classroom, you can also create your own stories. Motivate your students to write by allowing them to enhance their written work with BookTrack Classroom. Copy / paste something you have written into BookTrack Classroom and add background music and sound effects to make your written work jump off the page.

BookTrack Classroom is integrated with Google Classroom which means it is easy to share student stories.

Note: There are two version of this tool, a commercial one and a classroom version. I recommend creating an account using BookTrack Classroom.

Live Reading Chart


Keep track of how many books and pages your class (or school) has read by taking advantage of the LIVE chart and graph feature of Google Sheets.
  1. Have students log their reading using a Google form (like this)
  2. The data that is collected feeds into a Google Sheet (like this)
  3. Create a chart that tracks pages and books read. (like this)
Embed the chart into a Document, Presentation, or Google Site and watch it grow!

Live reading chart | John R. Sowash

Interested in setting this up for your school? I did all of the hard work for your! Click here to make a copy of everything you need!


Note: due to limitations with the new Google Sites, you won't be able to make a copy of my site. Setting up your own will only take a few minutes.

Family Note: My wife challenged our 2 oldest kids (ages 8 & 6) to read 100 books. She calls it the "Donuts with Dad reading challenge."
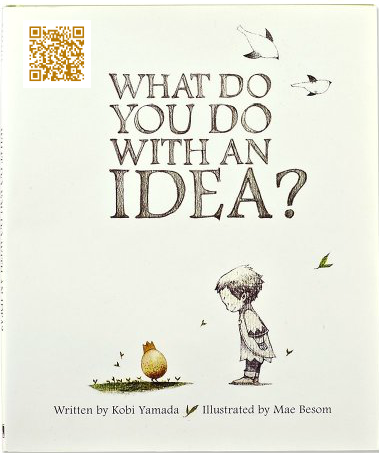
What do you do with an idea? Video Book review

Video Book Reviews

If you don't have enough time to work on a written book report, have students record a short 30-60 second video book review. I recommend using Screencastify to quickly record a video and save it to Google Drive.

Generate a QR code that points to the video (instructions). Attach the QR code to the book. Students can use ScanQR, a free Chrome App, to scan QR codes and watch the student video.

I tested this out with my three oldest kids:

If you have other fun and effective ways to get students reading and writing I would love to hear about them! Send me an email or hit me up on Twitter!

Wednesday, February 8, 2017

My Most Epic Spreadsheet Ever

My Most Epic Spreadsheet Ever

My Most Epic Spreadsheet Ever

I'm an English major. I think in words. Spreadsheets are NOT my favorite. However, in the past few years I have come to appreciate the power and logic of these sheets of cells. Recently, I realized that a significant portion of my consulting business runs on a single Google sheet, which was both amazing and terrifying! I run events across the country. My goal this year is to schedule 35 of these multi-day events. I don't have an assistant, secretary, or office manager. Efficiency is key, so I set up systems, like this one:

1. It Starts with a Form

Anyone who is interested in hosting one of my events fills out this form. It's very simple; nothing fancy going on.


2. I map the locations


I need to make sure that I don't schedule too many events in one area. I use an add-on called GeoCode to automatically add each event to a custom map. This map is private to me and let's me see the geographic distribution of my events. GeoCode automatically maps my events every time a new form is submitted.


3. Send Event Agreement

Now that I have collected all of the necessary information, I use Autocrat, a free Add-on for Sheets, to generate an event hosting agreement that looks like this. I (manually) verify the information and send it to my contact. The event gets tagged as "pending." Tagging the event puts a hold on the steps below.


4. Send Registration and Event Flyer

Once the host district has reviewed and signed the host agreement, I manually create a registration page using nVite. The registration URL goes into the spreadsheet. I then change the event tag from "pending" to "confirmed." which triggers another AutoCrat sequence (it checks for new jobs hourly) which generates a unique digital event flyer. AutoCrat sends a custom email to the event host with access to the flyer and other important information.


5. Update the Website

I hired one of my former students as my web and graphic designer. He makes all of my websites and print projects look amazing! Once an event has been confirmed, FormMule sends him an automated email (looks like this) with all of the event information so that he can post the event to my website.

6. Manage and Monitor

Each of the add-ons I use inserts new rows and headers into my spreadsheet which makes it very cluttered. I hide columns that I don't need to see and create custom filters to isolate specific types of events or events from a specific state.
That's it! This entire process is transparent to the host school. If I do my job correctly everything goes smoothly and the event is a success! Google Sheets, forms, and add-ons allow me to build powerful, time-saving system.

Develop a System!

I wish more schools took advantage of add-ons, form, and sheets. There are a LOT of school systems that can be improved with these tools: lunch counts, discipline referrals, continuing education credit tracking, event registration, classroom evaluations, room reservations, volunteer registration, permission slip tracking, and more! If you need a hand building a system for your school, let me know. It won't be free, but will pay for itself in the hours you save once the system is in-place.

If you developed your own automated system, I would love to hear about it! Leave a comment and let me know what you built!

Resources:


Saturday, January 7, 2017

How to Disrupt your Classroom in 2017


While technology in the classroom has greatly increased and improved over the past 20 years, the teaching methods that we use, haven't kept pace! It's time to disrupt traditional teaching methods! Here are four ideas to get you started.


1. Ditch boring lectures

Sit-n-get lectures don't encourage collaboration or critical thinking. Instead of firing up your favorite PowerPoint, use Pear Deck to engage your students with questions and activities. Pear Deck allows you to add multiple choice, short answer, free response, numerical, drawing, and interactive questions into any PowerPoint or Google Slide presentation. It's super easy and it integrates with Google Drive and Classroom! Here's a 30 second video to help you get started!

2. Make your Students Teach

Ask students to record a short (1-3 min). screencast that explains an important topic or idea you are studying. I recommend Screencastify, but there are lots of options out there!

Have them save their recording to Google Drive and add a link to the video into a Google Presentation or document that the entire class has access to.Now every student has a mini lesson on all of the essential topics you are studying! Here's an example of essential tech skills that a group of teachers put together over Christmas break.

3. Put the technology away!

Technology is great, but should serve a specific purpose. Sometimes, the best way to shake things up is to do the opposite of what students expect! Instead of using technology, put it away!

Have students "pass notes" in class on paper rather than commenting in a Google doc. Or have them conquer a Breakout Edu Challenge!

4. Give students choice!

Too much of my own instruction was sequential and "one-size fits all". Give your students choice by using hyperdocs! It's a simple idea - a hyperdoc is a "menu" of small activities and choices that helps students explore a topic. Your "menu" should include sufficient choice and flexibility to allow students to express their learning in their own unique way.

Check out this great example from middle school teacher Tonya Nugent.

Sunday, December 25, 2016

Lesson Ideas for #Chromebook Classrooms: Simple Story Builder

Note: this lesson idea is an excerpt from my book, The Chromebook Classroom. If you find this lesson helpful, you will enjoy the 40+ lessons from the book! Pick up a copy on Amazon or at chrmbook.com!


Dialog and character interaction is what makes fiction immersive and engaging. Learning how to write engaging dialogue is difficult, but with Google Story Builder, students can practice the writing process in a fun and interactive way. Students can add multiple characters and background music to set the tone for their story.

The purpose of this assignment is to help students practice and experience writing dialogue. It takes a lot of time to come up with characters, a plot, and a setting for a short story. Rather than coming up with these elements on their own, have students use a plot generator to automatically suggest all of the required elements. Not only will this save time, students will find the crazy plot suggestions quite entertaining!

After generating and reviewing their plot, students will use the Google Story Builder tool to write the dialog for a portion of their story. The story builder tool is purposefully restrictive and only allows a maximum of 10 characters, with no more than 10 comments from each one.

After completing the dialog, students can customize their background music, then publish and share the video for others to watch.

CCSS: CCSS.ELA-LITERACY.W.5.3
Write narratives to develop real or imagined experiences or events using effective technique, descriptive details, and clear event sequences.

Here's an example of a finished story:

Tips and Suggestions

Stories cannot be modified once they are published. Encourage students to plan their story on paper before building and publishing their digital story.

Stories cannot be downloaded. The only way to share a story is to copy the unique link to a published video. Create a shared Google document to collect and share links so that students can watch each other’s creations.

Resources:


Saturday, December 24, 2016

Lesson Ideas for #Chromebook Classrooms: Flipped Book Reviews

Note: this lesson idea is an excerpt from my book, The Chromebook Classroom. If you find this lesson helpful, you will enjoy the 40+ lessons from the book! Pick up a copy on Amazon or at chrmbook.com!

Have you ever sat through a series of book reports or student presentations and watched the clock tick away as one student after another comes to the front of the room to give their report? Have you ever longed for a more efficient way to allow students to present their work? With flipped book reports, students simply record and post their presentations online, which can then be easily shared with family members and classmates.

For this activity, students will develop a book report based on the guidelines provided by the teacher and use the free Chrome app Screencastify to record their voice and screen as they deliver their presentation. Their presentation can be created in Google Slides (template), Prezi, or any other presentation tool. It may be best to assign the recording as a homework assignment to minimize background noise and distractions.

Note: The free version of Screencastify limits recordings to a maximum 10 minutes.

It is recommended that students share their recorded book report with the rest of the class. Posting videos to Google Classroom is a simple way to exchange video links! Each student watches and peer edits several videos created by classmates. A rubric for evaluating should be used to help guide the peer editing process.

Bonus: link the finished book reports to the physical books in the library using QR codes

Helpful Resources:

Thursday, December 15, 2016

Lesson Ideas for #Chromebook Classrooms: Collaborative #Math Study Guides

Note: this lesson idea is an excerpt from my book, The Chromebook Classroom. If you find this lesson helpful, you will enjoy the 40+ lessons from the book! Pick up a copy on Amazon or at chrmbook.com!

The best way to learn something is to teach it to someone else! For this activity, students who need to learn materials for an upcoming test will use the Ziteboard whiteboard extension to solve a math problem while recording their solution using Screencastify. Students will add their recording to a class Google Slides presentation so that everyone can review this problem type.


Lesson Overview

Give each student a different problem to solve. Provide them with time to review and practice the steps. If students are unfamiliar with Ziteboard and Screencastify, you may need to provide additional time for them to practice with these tools.

Students will use Screencastify to record the steps required to solve their assigned problem. Ziteboard provides a writeable surface ideal for showing work. Ziteboard works great on touchscreen chromebooks. Screencastify will record both the screen activity and the students voice.

The finished Screencastify recording should be saved to the students Google Drive account. Students will need to make the recording visible to "anyone with the link".

The final step is to have students place their links into a class Google Slides presentation. This can also be done in Google Sheets or Docs; however, Google Slides will allow you to assign each student their own Slide page.

Each student now has access to a student-generated study guide with dozens of practice problems!

Resources

Thanks to Carrie Moeggenberg, Instructional Technology Coach, Ludington, Michigan for submitting this lesson idea!

Tuesday, December 13, 2016

Lesson ideas for #chromebook Classrooms: Typing for Elementary Studentds

Note: this lesson idea is an excerpt from my book, The Chromebook Classroom. If you find this lesson helpful, you will enjoy the 40+ lessons from the book! Pick up a copy on Amazon or at chrmbook.com!

Much like handwriting, typing is an essential life skill that students must learn as quickly as possible. Chromebooks are compatible with many free resources and programs that can help students improve their typing speed and proficiency. Typing practice is a great enrichment and reward activity once other work has been completed. Regular practice is key.

The following typing tools are good options for elementary classrooms.

Dance Mat Typing:


  • Where to find it: http://chrm.tech/1ZHrFmk
  • Includes good verbal instructions (headphones will be helpful!)
  • No login or configuration required, however, progress is not saved or tracked.

Typing.com:

  • Where to find it: http://www.typing.com/tutor/
  • Teacher must set up a class and enroll students to view progress and collect data.
  • Free version is ad-supported

Typing Club: 

  • Where to find it: https://goo.gl/Sn1mpC
  • Features a Chrome App
  • Saves student progress, but data is not shared with the teacher.

Typing Lessons: 

  • Where to find it: https://goo.gl/4kdgxG
  • Get started fast! No setup or login required for practice.
  • Log in using Google to track progress. 
  • Features a fun multiplayer game

Typing Practice Games

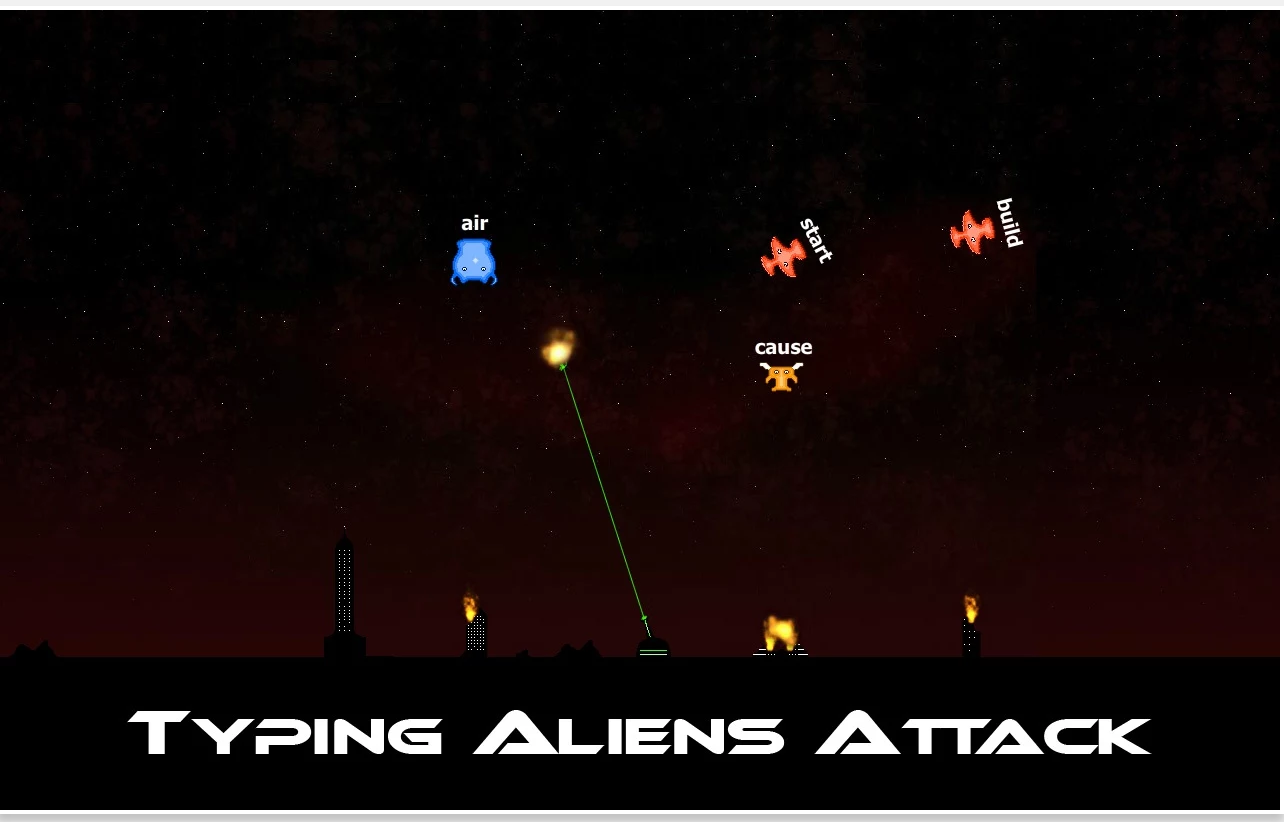
  • Typing Aliens Attack: https://goo.gl/4AbxAQ
  • Typing Games: https://goo.gl/0EmD3F


Monday, December 12, 2016

Lesson Ideas for #Chromebook Classrooms: Getting Started with Computers


Note: this lesson idea is an excerpt from my book, The Chromebook Classroom. If you find this lesson helpful, you will enjoy the 40+ lessons from the book! Pick up a copy on Amazon or at chrmbook.com!


About this lesson

Young students will need to learn basic computer skills and knowledge in order to use their Chromebooks well. Lead them in the following activities early in the school year, so they can get comfortable using a Chromebook sooner.
Mouse / Trackpad Activities

Navigating with a mouse or trackpad can be difficult for little hands and fingers. Here are some exercises to help build mouse skills:

Practicing Logging In

Even young students should have their own account to log into, not a generic class account. They CAN do it! Give students time to practice and master this skill. Turn it into a game! Keep track of how long it takes the entire class to log in. Write down the times in a visible location. Each day, challenge your class to see if they can beat the previous class log-in record. 

Understanding Computers

One of the best tech lessons we can give our students is the chance to build their technology vocabulary and knowledge of how computers work. Here are a few activities that build technology literacy in young students:

Paper Computers: Before allowing students to use a “real” computer, have them build a computer out of paper and identify important parts such as the trackpad, screen, power port, USB port, search key, etc. 


Computer Bingo: As a class, make a list of all of the important parts of a computer. Write each of the parts on a slip of paper and put them into a bowl or basket. Have students fill out a bingo card with some of their favorite components, then play BINGO as a class. 
Simon Says - Chromebook Edition!Provide each student with a Chromebook. Give students simple tasks to perform: open a new tab, log out, open the Learn To Count app, close the lid, etc.

Friday, October 14, 2016

Replacing the Research tool in Google Docs


By now you may have noticed that the "Research" tool in Google Docs, Slides, and Drawing has been replaced by the "Explore" tool. While Explore adds a few nice features (see my previous post for a complete overview), it has removed the citation feature which was heavily used by K-12 teachers.

There has been a fairly vocal outcry from educators because of the removal of the research tool. If you are disappointed that the research tool is no longer available you can send your suggestions to Google by opening a Google Document and visiting help > Docs Help > Send Feedback. 

Google does seem to be listening to this feedback as a the Docs team has created a survey exploring the use of the research tool. You can complete the survey here.

**Update the survey above is no longer accepting responses. The Docs team is reviewing feedback and considering a solution.**

While I too am a bit disappointed that the Research tool has been removed, there are a few facts to remember: 
  • The "citations" generated by the Research tool weren't really citations, they were footnotes.
  • Sometimes all you got was a link to the source, not the author, date, publication, etc.
  • While the Research tool gave you the option to switch between MLA, APA, and Chicago style, the formatting of the "citations" weren't in the correct format anyway. 
  • The research tool didn't create a bibliography or works cited page. 
Yes, the Research tool was a great place to start and I would love to see it brought back. However, there are some even better ways to handle citations and bibliographies that you can use right now!

EasyBib - Add-On for Google Docs

EasyBib has developed a free add-on for Google Docs that make it super easy to cite books, articles, and Websites. Just enter the URL, title, or ISBN number and EasyBib does the rest. The add-on will create a works-cited page (bibliography) for you and supports dozens of citation styles (most of which I have never even heard of!). Get started by connecting the add-on here

EasyBib also offers a Chrome Extension, however it requires setting up an EasyBib account and is not as easy to use as the other citation extensions listed below. If you are an EasyBib user, or your school has paid for the premium version of EasyBib, the extension may be of value to you. 

Cite This For Me - Chrome Extension


Visit any website and click the "cite" button and you will receive an automatically generated citation in your preferred format. Click "add to bibliography" to collect all of your sources and then copy/paste or download your list for further use. One neat thing about Cite is the fact that you don't have to log in or create an account to collect your resources (although the recommend that you do.). I tested this extension on several obscure websites and it did a great job. It even prompts you to enter missing information that it is unable to find. 

Apogee Citation Creator - Chrome Extension


Apogee is a super light-weight extension tool. Click the button and get your citation. No configuration, settings, or advanced options. Copy the citation and paste it wherever you need it. Apogee isn't as accurate as Cite This For Me (sometimes it misses the author), but it gets the basics. 

Citation Machine - Website

For very specific or obscure citations (Podcasts, YouTube Videos, etc), you may need to create a manual citation. I have used Citation Machine for many years (it helped me earn my M.Ed. degree!). It has been updated a bit, but is still dead simple to use and supports hundreds of different source material. Citation Machine doesn't automate the citation process, but it guides you through and creates perfect citations. 

I have looked at four possible replacements for the Research tool. Even if Google brings back the Research feature (we can hope!), you will need one ore more of these tools to create a true, properly formatted citation. 

I know there are many more citation tools out there. If you have a favorite that you would recommend, please leave a comment below!

Thursday, October 13, 2016

Adobe Spark for Simple Multimedia Projects

One of the most important things we can teach our students is to communicate ideas to others. Multimedia is a great tool to do just that. As educators, we would be negligent if we did not help our students become effective consumers and creators of multimedia. Because I believe strongly in this, I am always on the search for simple tools that allow students to communicate with words, pictures, video, and audio.

One great option is Adobe Spark - a free tool from the creators of PhotoShop, InDesign, and many other professional design products.

Adobe Spark has a few immediate things going for it:
  • Simple log in / signup process (You can use your Google Account)
  • Super simple interface with minimal buttons and clutter. 
  • Fully web-based and works outstanding on a Chromebook!
There are three different project options in Adobe Spark - posts (still image), page (mini web-site) or Video (photo slide show). 

I worked with my two oldest kids to create a short video project on pollution (their science topic for this week). They went out with their Android tablets to take pictures and then we incorporated their photos, text, and voices, into the video project.

The project interface is simple enough for elementary age students to easily navigate. Icons throughout allow early readers to navigate with ease.


The video project type allows you to select images, add text, and add short voice-over if desired. Adobe Spark automatically applies a fade in/out to pictures (Ken Burns effect) to add interest. A generous library of royalty free music provides background accompaniment.

There are 5 page layouts from which you can choose. The limited options keeps things simple and allows project development to progress quickly.

Audio recording occurs on each individual page. Simply press and hold the microphone button while you speak.

Spark also provides a solid selection of project themes to ensure that the fonts and colors used in your project are easy to read and match nicely. You must chose from one of the provided themes which can not be customized.

Adding images is easy as Spark provides a (limited) image library and also integrates with Adobe Creative Cloud, Adobe LightRoom, DropBox, and Google Photos. For our project we uploaded pictures into a shared Google Photo Album and were able to easily access them from Spark. You can also directly upload your own pictures if you wish to get pictures from Google Drive or another storage solution.

It was quite simple to collect all of our material, design, and polish our video project. We spent about 30 min. putting everything together (not including taking the pictures). The entire project was completed on an Acer Chromebook.

Here is our finished Spark video project!


There are a few things to consider before adopting Spark for your next class project.
  • Spark is not collaborative -  students will need to share a device if you want to make this a group project. 
  • Spark is slow - I was a bit frustrated by the slow loading speed of our project, photos, etc. It works great, you just have to be patient. 
  • Adobe adds a "made with Spark" screen at the end of your presentation. You can chop it out if you use a video editor.  
  • Spark does not support video uploads - You can only work with still pictures
I was generally impressed with Adobe Spark and will certainly use it for future projects. If you are looking for a simple multimedia project option that works great on a Chromebook, Spark is a great option!