The Electric Educator: September 2016

Sunday, September 25, 2016

Does your Chromebook have a Virus?


No. The answer is no. But there are a LOT of people who would like you to think it does! 

It all starts when you end up on a sketchy website and are immediately greeted with a very scary looking warning that indicates your system has been infected, locked, disabled, etc. You are warned against turning off or restarting the computer (to prevent "data loss") and are urged to call a number or visit a website and complete some sort of form.


The scary part is that you usually can't get the warning message to go away. Clicking "okay" just brings it back again. This can cause some people to think that they do actually have a virus. 

If you are on a Chromebook, I am 100% sure that you do NOT have a virus, because there are NO known viruses for ChromeOS. This is the result of ChromeOS "verified boot" which ensure that the ChromeOS operating system can't be modified from the official release from Google.

Furthermore, any warning that indicates your disk drive, memory, or storage has been compromised can't be true because data is not locally stored on a Chromebook (for the most part anyway!).  

The message that you are receiving is a "Phishing" attack that is designed to make you nervous enough about this "virus" that you provide personal information to someone in order to get them to help you remove the "virus". Some scams will provide you with a tech support phone number (don't call it!) or suggest that you visit a certain website and enter your personal information (don't do it!).

What should you do? Here are the steps you can take:

1. Prevent more warnings - ChromeOS usually provides a small check box on pop-up notifications to "prevent this page from creating additional dialogs." Click this box and press okay. You won't see any more warnings from this site.

2. Re-trace your steps - How did you end up on the phishing website? Usually there are two options:

  •  You clicked on a link from an email, social media post, If this is the case, notify the person that sent it to you so that they don't continue passing it on. No other action required. 
  • You recently installed a new Chrome Extension. Sadly, there are some Chrome Extensions that are designed to take people to websites with phishing scams. Google does its best to review and prevent such rogue extensions, but it happens. If this is your situation, you will need to uninstall the extension by visiting chrome://extensions/ and deleting the extension that is causing trouble. If you aren't sure which one it is, disable them all and turn them on one at a time until the problem occurs again. 
3. Powerwash - this step is only necessary if the recommendations above didn't work. Powerwashing restores your Chromebook to factory default settings, eliminating any issues you are having. Because all of your data is stored "in the cloud" (except your download folder) you don't have to worry about backing up data prior to powerwashing your Chromebook. To powerwash your Chromebook visit Chrome settings and look for the powerwash button (at the very bottom). 

If you are really in bad shape and can't even get to the settings menu due to constant pop-up notifications, you can powerwash your device from the login screen. Turn off your Chromebook (hold down the power button) and restart. When you get to the sign-in screen, press Ctrl + Alt + Shift + to initiate the Powerwash process. 

Here are the important things to remember from this situation: 

1. Your Chromebook does NOT have a virus. 
2. Do NOT provide any personal information (credit cards, phone number, etc) to someone to "fix" this issue. 

If you or your students have experienced an issue like this please leave a comment and let us know how it happened and what steps you took to eliminate the issue. Hopefully we can put together a collection of bad extensions to avoid.


Saturday, September 24, 2016

Grading and Feedback tools for Google Docs

Lots of resources are available on using Google Docs to assign student work, but there isn’t much regarding grading student work electronically.

Here are three strategies for providing feedback to students. 

Suggest an Edit

To identify mechanical changes (grammar, spelling, punctuation) use the “suggestion” feature available for Google Docs.

As you mark corrections to the student’s work, they will be automatically represented by green correction marks. The student will see your correction and will need to “approve” the revisions before they are made permanent in the document.

Tracked changes can be accepted or rejected by document owner and collaborator.

Note: this feature is only available for Google Docs. This is also a great tool for peer editing. 


Leave a Comment

For remarks related to style and content, use the commenting feature. Comments are like little “sticky notes” that you can attach to an part of a document, presentation, or spreadsheet.
Highlight a word, sentence, paragraph or image and add a comment by “right clicking” and selecting “comment"


Tag someone in a comment by typing @ and their email address. Tagged individuals will receive an email notification prompting them to open the file and reply.


Use the Checkmark Chrome Extension

Use the free Checkmark Chrome extension to add common corrections (spelling error, run on sentence, missing punctuation, etc) as a comment.
Watch this video for instructions on how to setup and use Checkmark.

Other Grading Tools

There are several Drive Add-ons that can help with the grading and feedback cycle:

Orange Slice Teacher Rubric Add-On for Docs
Orange Slice makes it easy to create grading rubrics for projects. They also have a student edition which allows students to see their rubric score.


Grade Proof Add-On for Docs
Grade Proof can identify spelling, grammar, and phrasing errors and will also suggest improvements to your sentence structure. Grade proof is a freemium tool, but the free version is still helpful.


Sentiment Analysis Add-On for Docs
Words have an impact. Sentiment Analysis will help you determine if your writing is overall positive or negative.


Docutus Add-on for Sheets
Doctopus is a complex add-on for Google sheets that provides a variety of assessment tools for any Google Drive assignment. Doctopus works well with Google Classroom.

Friday, September 23, 2016

10 Google Forms Tricks!


Google Forms is great! You can use it to create a survey or a quiz, or collect registrations. But there is more to it than you might think. Here are 10 tricks to help you get more out of forms!


1. Limit response length
When using short answer or paragraph text question types, turn on data validation to limit response to within a certain character limit. Note that this is a character, not a word limit. Turning this feature on does not provide users with a character count, but they will see an error message if they exceed the limit.


This feature can be used to limit responses on forms such as a call for speakers or to ensure that complete sentences are used on a student quiz.


2. Validate Email Addresses
For some reason, people have a hard time typing in their own email address. It is not uncommon to get email addresses with accidental spaces, commas, or incomplete information (i.e. no .com). You can eliminate this issue by using the data validation tool for email address on a short-answer question. This ensures that the information provided will fit username@domainname.com/net/org.


3. Shuffle option order
Preventing cheating is a concern of teachers who use tools such as Google forms to deliver assessments. While it is impossible to eliminate all possible methods of academic dishonesty, you can certainly make it harder to cheat! Turn on “shuffle option order” for a multiple choice or checkbox question to randomize your assessments. This feature can be used inplace of the “shuffle question order” option or in conjunction with it. Using this feature will NOT impact the use of Flubaroo or the quiz feature of Google Forms.


4. Block your sections
If your form has several distinct sections such as personal information, and survey questions, or sections from different topics covered in class, you can block them in two ways:


Insert Title / Description
Use this feature of forms to add a colored break in the form to identify a new section. You can also add a description with special instructions. Using this element does not break your form into multiple parts.


Insert Section
A section is similar to the Title / Description except that it actually inserts a page break into your form. This is helpful if you want to clearly divide your form into multiple parts. For quizzes, this can be a helpful way to prevent students from looking ahead/behind in the quiz. You can also show users a % meter to indicate how much of your form is complete.

Screenshot 2016-09-21 at 10.32.44 PM.png


5. Create branching forms
Remember the old “Chose your own adventure” books? You would get to the end of the page and either go to page 7 or 15 based on a decision you made for the characters in the story? Google Forms can do the same thing.


Configure a multiple choice question to take the user to a new set of questions based on their response. This is very helpful if you want to skip a section that is not relevant to the person completing the form. It can also be used as a simple adaptive assessment tool. If a student answers a multiple choice question incorrectly, they can be directed to an easier question or to material that will help them review the skill they need to develop.


In order to use the branching feature of forms you must have to elements:
  1. A multiple choice question
  2. A least two sections (see above) in your form.


6. Use Multimedia
Text-only forms are boring. Make them more engaging by including video and images! This is especially helpful when using forms for assessment purposes. Here are three ideas to consider:


  1. The labeled image - insert an image with a series of labeled elements (i.e. parts of the cell, characters in a story, etc). Below the image, insert several questions that require students to reference the image above.
  2. The Video challenge - Insert a YouTube video into your form that provides students with a quick (1 min or less) set of information. Ask questions about the image. This works great for music and world language courses!
  3. The Animated Gif - use an advanced image search to find animated .gif files. Save and insert the image into Google forms and watch it move! This trick is great for science courses and for schools who are blocking YouTube.


NEW: As of August, 2016 you can now use images for multiple choice questions! This is a great new feature that will be particularly helpful to elementary and math teachers. If you are using Flubaroo or the Quiz feature in forms to grade assessments, it is important to make sure that you do include a text label in your form otherwise you will not be able to determine which selection a student made when you look at the linked spreadsheet.


7. Reuse your form - not your spreadsheets
It takes a lot of work to develop a survey or quiz using Google Forms. Once you have invested the time to create a form you can re-use it over and over again! DON'T make a copy of your form, instead, follow these steps.
Note: these directions are for the NEW forms. If you have old forms, you may need to update them before following the steps below.


  1. Open your form
  2. Click on the response tab
  3. Click the “snowman” (three dots in the right corner) and select “unlink form.” This will unlink the form from the previous sheet that was collecting responses. It will NOT delete the data you have already collected.
  4. Click the “snowman” again and select “delete responses.” Although you have disconnected the spreadsheet, your form still retains the previous response data. This action will reset your form to zero. The original form data IS still contained in the spreadsheet that was unlinked in step 3.
  5. Click the snowman and click “select response destination”. Name the spreadsheet with a specific name. This is where NEW responses will be sent.


This trick above is helpful for teachers who have multiple sections of the same course but don’t want to copy their form for each section. Each section gets its own SHEET, not its own FORM.


8. Copy / paste a list
Sometimes it is best to ask respondents to make a selection from a list rather than type in a response. Typing that list into Forms can be tedious. Instead, copy and paste it! Google Forms will place the copied elements into the form as a new selection. This is great for creating a class list or a selection of times for parent teacher conferences.  


Note: there does seem to be a limit to how many lines can be copied at one time. If you are having trouble pasting your list, try a smaller number of items (10-15 seems to work).


9. Form Restrictions & Roadblocks
There are times when you may wish to prevent a form from being completed until certain other actions have been taken. For example, a teacher may not want students to take a quiz until she has verified that they have completed their homework. Google forms only offers an on/off feature and does not offer password protection.


You can setup a makeshift password protection on your form by using the data validation option in a short-answer response. Here’s how:


  1. Create a new section in your form. This is where your “password” field will live.
  2. Create a short answer question in section 1.
  3. Turn on data validation and set it to: Number > Equal to > [insert a secret number]
  4. Add help text: Please check in your homework to receive the password to complete this quiz.
  5. Add your quiz questions starting in section 2.


Note: this is NOT a 100% secure system and should not be used to protect critical information. It is possible to reverse engineer the secret code. Some of your students may know how. I will not explain how here in case they are reading this right now...! = )


10. Add-Ons
Need to do something else not listed here? Add-ons may hold the solution to your problem! Add-ons are utilities that can expand what Google Forms does on it’s on. Add-ons must be “installed” before you can use them. To access the add-ons, click the “snowman” icon in the top right corner of a form and look for the “add-on” puzzle piece icon.


While there are many add-ons available, these are the ones that I have found quite helpful.
  • Choice Eliminator 2 - removes options from your form once they have been selected. Perfect for time slot registrations or other limited quantity applications.
  • FormRecycler - pull in questions from other forms.
  • FormLimiter - restrict your form to only accept a specific number of responses or turn it off at a certain time.
  • Form Publisher - publishes form responses as documents or PDFs. Very helpful when collecting long-form responses which are difficult to read in a spreadsheet.
  • All Questions Required - yup, that’s what it does!

Did I miss anything? Let me know what form feature is your favorite!

Interested in seeing these ideas in action? Check out my post on 25 Ways to use Google Forms in the Classroom!

--------------------------------------

Are you ready to become a Form Fanatic?

Are you a Form Fanatic?Each spring I offer a 5 week Google Forms masterclass. Join me for a deep dive into Google Forms!

The feedback has been outstanding:
"I was a casual user of Forms, but I was not using the data that I had collected to it's full potential. Now I am writing better Forms so my data is of higher quality and I am better able to analyze the results so I'm making decisions based on data...not just giving surveys." - Laura Foreback, middle school teacher
This course is perfect for classroom teachers, tech coaches, and school administrators!

Interested? Visit Chrm.tech/forms for all the details!

Thursday, September 22, 2016

Restrict Answer Length in Google Forms

Many times educators need to encourage / remind students to type in complete sentences or to limit their response to certain word count. A recent update to Google forms makes this possible - and it's easy to do!

How to set a min / max response length in Google forms.
  1. Create a short answer or paragraph type question. 
  2. Turn on data validation (click the "snowman" dots)
  3. Select min / max length (in characters)
  4. Include an error message to remind students of the length requirement. 
Note: the length setting is a CHARACTER count, not a word count. The count includes punctuation and spaces (this sentence is 103 characters).

If students exceed or fail to meet the required character count they will see the custom error message that you have entered. If this is a required question, they will not be able to submit the form until their response meets the criteria.


Wednesday, September 21, 2016

OMG! Google Docs has Columns!

In what may be the biggest feature launch since Google Wave (RIP), you can now add columns to your Google Documents! No more use of tables to fake columns!


Simply go to Format > Columns to get started!


This feature currently supports 1-3 columns with custom margins and a dividing line (if desired).

That takes care of one of the most common complaints I hear about Google Docs. What's still on your list of missing features? 

The Two Commandments of Google Drive


Follow these two rules and you will have a much more effective, and pleasant experience as you collaborate with your students. 

Always DIVIDE your Document

You may have experienced the chaos of working on a shared Google Document with 15, 20, or 30 individuals - what a disaster! No one knows where to type and ends up writing on top of each other, deleting work, etc. When collaborating with more than 10 people, it is important that the workspace is structured in a way that clearly identifies where each person is assigned to edit.

Always SHARE your Document

When documents are shared so that “anyone with the link can edit” you lose the ability to hold students accountable for their work. This leads to sloppy, lazy, and uninspired contributions. SHARE your document, presentation, or spreadsheet with your student using their email address (or assign it using Google Classroom). This will force students to sign into their Google Account and will record all of their contributions.

These are my 2 commandments - what are yours? 

Protecting Shared Documents in Google Drive

Sometimes important information and data needs extra protection. Google Drive allows you to set expiring (i.e. self-destruct mode) access and restrict re-shares, downloads, and copy of data from shared documents.

To access these settings, share a document and click “advanced”.

Important Notes: 
  • Expiring access can only be configured for viewing and commenting (not editing).
  • The document must be shared before you can set expiring access. 
  • Restricting copying also disables the ability to copy / paste text from a document. 

Tuesday, September 20, 2016

3 Attributes of a Dynamic Classroom


1. The modern classroom is agile


Teaching is less like a marathon and more like an obstacle course. Each year, group of students and class presents new and unique challenges. One of the most important competencies you can develop is the ability to adjust and adapt to the unique needs and situations of your students.

The increased availability of technology in the classroom has made it easier for us to make quick adjustments to content, teaching methods and style with ease that has not previously been possible.
The typewriter, laserdisc, mimeograph, and scantron were not designed for agility. Google Drive, Pear Deck, Remind, and Google Classroom allow us to make agile adjustments.

A major detriment to agile teaching is over scheduling and planning. I am a type-a person who regularly plans twice as much content as I need for a lesson. Such planning limits the spontaneous discussion, questions, and think time that is needed for student engagement.

Don't plan out every minute of your lesson. Provide time for students to think, ponder, and explore on their own. "Boredom" is not a bad thing. In fact, many important observations and inferences are discovered when the mind wanders.

Learning is a process, not a destination. Like any good road trip, there are likely to be unplanned detours along the way. Structure your classroom to anticipate these detours and building on top of flexible tools allows a teacher to take the detour without derailing an entire semester of learning.

Here are some tips on making sure that your classroom is agile:
  • Collect actionable data (formative assessment)
  • Respond to the needs and interests of your students (i.e. PokemonGo, MineCraft, etc.)
  • Build margin into your classroom

2. The modern classroom is individual


If you have read the history of the educational system of the United States, you may have come across the idea that it was designed on a factory model. While factories are great for building cars and iPhones, they aren't the best for educating students for the diverse needs of the 21st century. Students are not widgets and you are not a welding robot that slaps on the next component in a long assembly line of teachers, classes, grades, and courses.

Students have different learning styles, aptitudes, interests and motivational factors. Like a good coach, your job is to push the right buttons for each of your students in order to help them achieve their maximum potential. Technology, once again, provides us the ability to provide choice differentiation to students without going crazy.

Educational curriculum and standards can be good or bad, depending on how they are used.

If you use your curriculum and standards as a measuring stick to determine what your students know and need to know, you have adopted a factory model to education; "here's the standard, let's see how you measure up."

If you view curriculum and standards as the recipe within which there is room for adaptation and creativity, you have adopted a student-centered approach to instruction; "we know what dish we're making, but we can substitute this ingredient for a bit more of this and end up at the same place"

Here are some suggestions to help you individualize your instruction:
  • Incorporate project based learning
  • Ask BIG questions not standards-based questions
  • Allow students to explore interests
  • Build choice into your classroom
  • Create a culture and have a personality

3. The modern classroom is a safe place


Sadly, too many students view school as a place of rules and punishment rather than a place of exploration and investigation. Students are naturally curious and interested in the world around them. Just look at the popularity of tools like Minecraft and Pokemon Go - both of which require a tremendous amount of exploration, creativity, and trial and error.

The modern classroom is a safe place that allows students to explore, investigate, and fail. Failure is looked upon in education as a negative result, however failure is frequently required before success can be discovered.

The modern classroom should emphasize iterative work where students are constantly striving to improve their work rather than expecting them to be perfect the first time. Rubric and standards-based grading are a great way to assess this style of learning.

The modern classroom should be free from judgement, criticism, and negativity. We must carefully build and monitor the culture of our classroom to ensure that it is inclusive, open, and free from judgement.

The safe classroom also reminds us that we need to make cheating and dishonest as difficult as possible. Such behaviour should not be tolerated. Sadly, there are always ways to cheat. We should never focus so much on the cheaters that we negatively impact the honest students by limiting their choice and freedom (see #2 above). Ultimately, cheaters hurt themselves. The culture that we cultivate should make that clear.

The easiest way to reduce cheating and academic dishonesty to is include a good mix of objective and subjective work and to ask Google Proof questions.

Here are some ideas for create a safe classroom environment:
  • Make your students WANT to learn
  • Explore rubric or standards-based grading
  • Give students time to explore
  • Include objective and subjective work
  • Ask “google-proof” questions
  • Make it hard to cheat
  • Don’t focus your class on the students who want to cheat.

Is your classroom agile, individual, and safe? Are these values that you support? 

Thursday, September 15, 2016

Skip Counting with Spreadsheets

I have 5 kids, three of which are in elementary school (kindergarten, first, and second grade). We are learning to skip count numbers 1-12. Each week we take two number sets and practice (this week we are practicing 5 & 6). Skip counting practice is a pretty rote and boring tasks, so we are always looking for new ways to practice the same thing:
  • Count out-loud as a group
  • Fill in a skip-counting worksheet (paper)
  • Sing the skip counting song
  • Use math manipulatives
I was recently inspired to create a skip counting spreadsheet as another way to practice and explore number patterns. Using a spreadsheet to practice skip-counting isn't all that different than filling out a paper worksheet, but it does have a few additional advantages: 
  • Conditional formatting can be used to illustrate number sequence and scale
  • The activity introduces young students (kindergarten, first, and second grade) to the concept of a spreadsheet. 
  • Begins building spreadsheet vocabulary (cell, row, column)

Unfinished Skip Counting Sheet
Finished Skip Counting Sheet
We will pull out this spreadsheet periodically to mix things up and practice our skip counting skills. 

You are welcome to make a copy of my template to use in your own class. I know there are many additional elements that could be added into this sheet (self-grading formulas and formatting). If you make any improvements, let me know by leaving a comment.


Friday, September 2, 2016

Using Topics in Google Classroom

One of my biggest annoyances with Google Classroom has been the lack of search. Students and teachers were forced to scroll through the entire stream to find an old post.

This frustration has been [mostly] resolved through the addition of “topics” in Classroom.


Topics help group related classroom information. Announcements, questions, and assignments can all be tagged with a topic.

Key points:
  • Only the teacher can create a topic
  • Only one topic is allowed per post
  • Topics are automatically listed on the left side of the stream for both teachers and students.
  • Topics CAN be renamed and deleted by teachers


The topic feature can be very helpful and powerful if used wisely. Here are some key ideas to consider:
  • Limit your topics - the more you have, the less useful they are.
  • A topic should be broad enough to encompass a significant number of classroom announcements, assignments, etc. If there is only a couple of posts, it’s probably not a topic.
  • Plan your topics at the beginning of the school year to prevent yourself from adding too many.
Setting up your topics:
  1. Sign in to classroom
  2. Open up a class
  3. On the stream page, scroll down to the topic block on the left side of the screen. 
  4. Click "add topic"
  5. To edit a topic, click the "snowman" (three dots) to edit or delete an existing topic.
  6. Repeat until all of your topics have been created.

Ideas for using topics in your classroom

Not sure how to use topics in your classroom? Here are some ideas to consider
  • Create a topic for each subject area that you teach during the day. This is especially helpful for elementary teachers.
  • Create a topic for each unit in your course (this is the most common way to use topics)
  • Create a topic for major assignments that require multiple parts, steps, instructions, announcements, etc (e.g. a research project).
  • Create generic topics: classwork, homework, announcements, resources

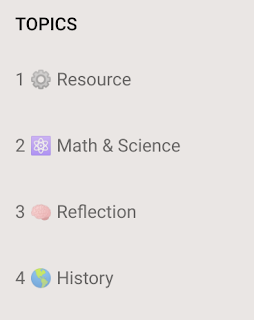
👉🏼 BONUS Tip 👈🏼

Spice up your topics by adding emoji icons! This helps break up all the text in Classroom. This tip is especially helpful for early elementary classrooms where students are still learning to read. 

To add emoji, you will need an emoji Chrome extension. There are lots available, but I use Emoji Keyboard 2016 which you can install here

To force-order my emoji I use this formula: number + emoji + title. 

How are you using the topic feature? Do you find that it is effective at organizing the classroom stream?